free doll tutus tutorial
September 28, 2017

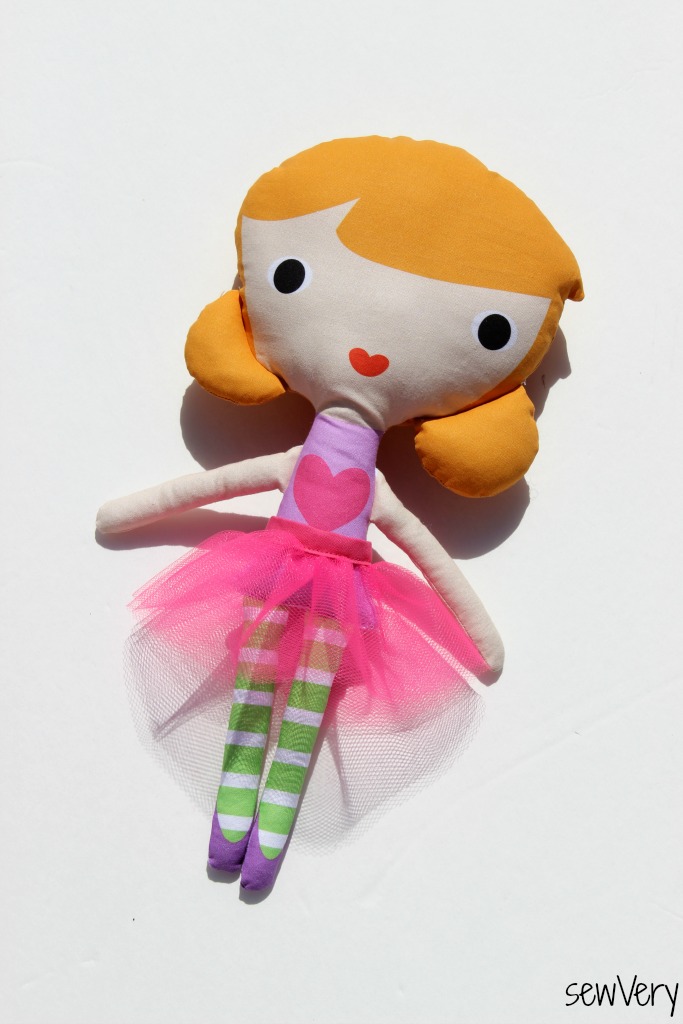
Now that the doll sewing panels are in stores, I thought it would be fun to do a couple of accessory tutorials. When I first started drawing Zoe as a kid, she always wore a tutu. So, I thought it would be only fitting that one of the tutorials would be for a tutu. All the Girl Friends agree;) Find the free tutorial below.


(all photos by Mary Craven Photography, except for 2, 3, and 5)
Doll Sewing Tutorial
SUPPLIES:
- 1 yard 6″ wide tulle for skirt
- 1.75″ x 6.75″ piece of quilting cotton for waistband
- 1 – Size 2 (9/32″) sew-on snap
- Thread
- Scissors
- Sewing needle
- Sewing machine
- Rotary cutter, mat, and ruler
- Pins
- Iron and ironing board
- Fray Check
ASSEMBLE:
1. Cut the 1 yard piece of 6″ wide tulle in half to create 2 – 18″ long pieces. Fold the pieces in half along the length to create 2 – 3″ wide x 18″ long pieces for the skirt.

2. Place the two folded pieces of tulle on top of each other with the folded edges together. Pin together along the folded edges.
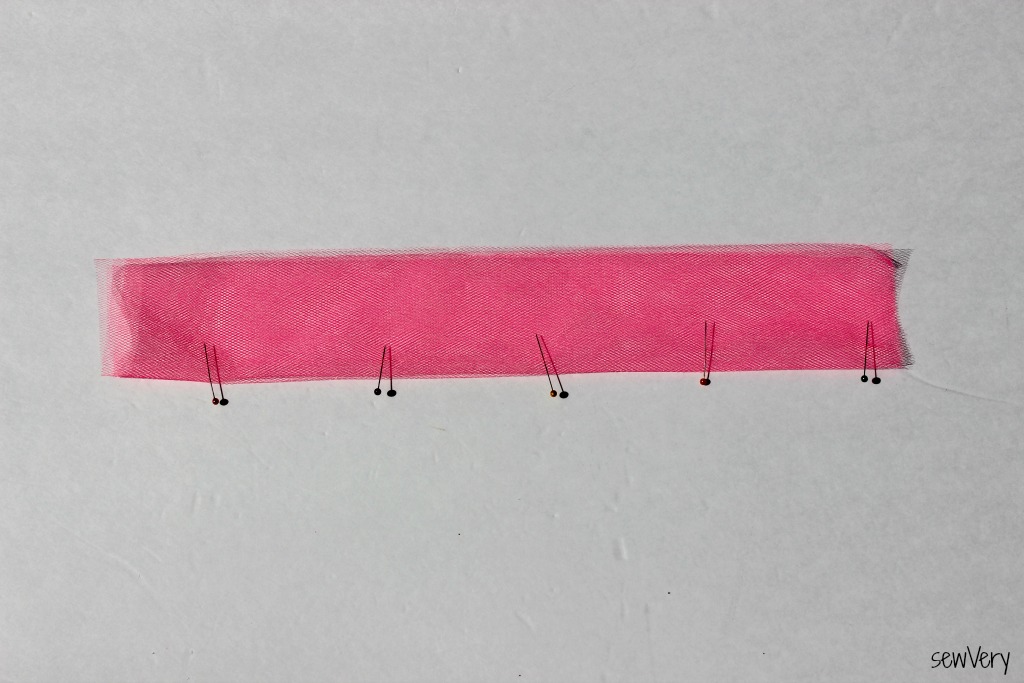
3. Baste the two pieces of tulle together 1/4″ away from the folded edges using a long stitch length. Do not backstitch at the beginning or end, and be sure to leave long tails of thread at each end. On the left end, tie the top thread and bobbin thread together into a knot to keep from pulling the thread out of the fabric on this end.
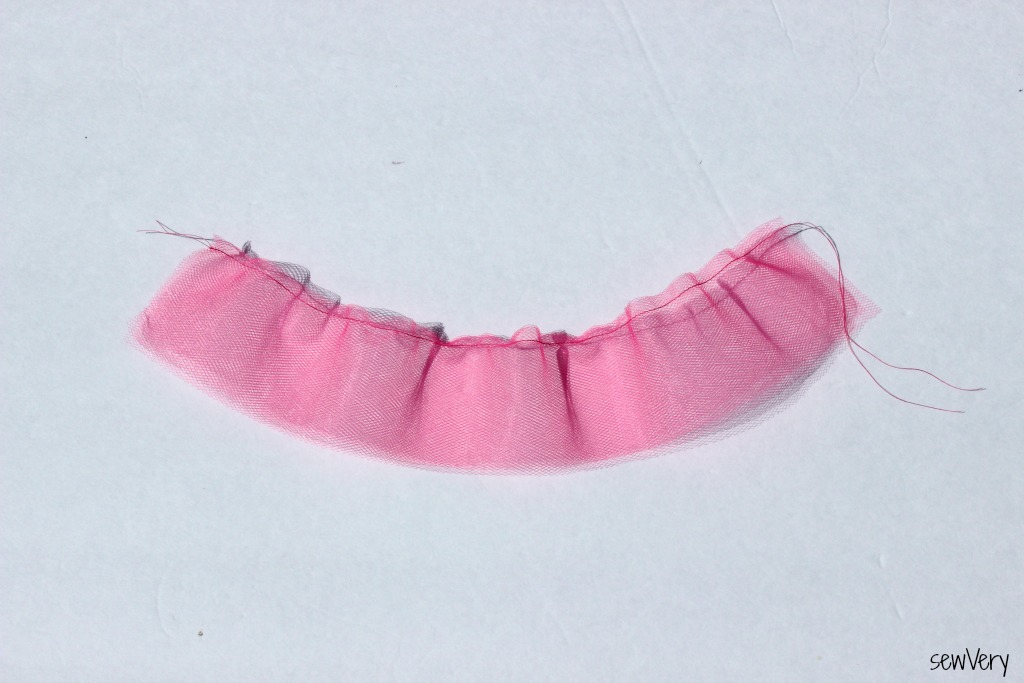
4. Pull the bobbin thread on the right end to gather the fabric to a length of approximately 6″ along the gathered edge. Tie the top thread and the bobbin thread into a knot to secure the length.

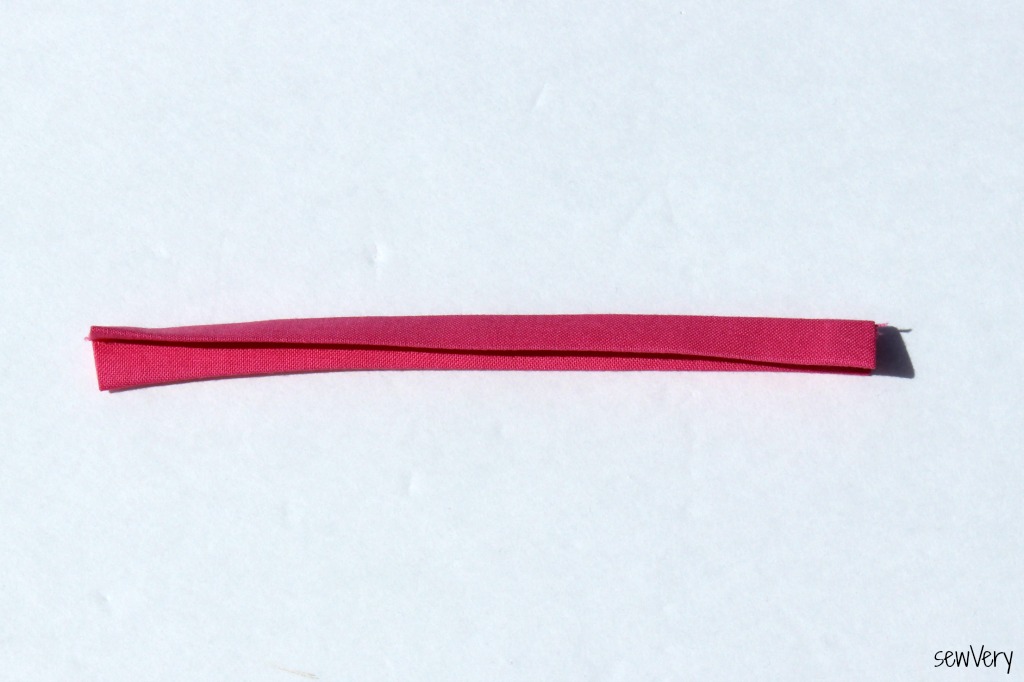
5. Use a hot iron to create the waistband by pressing the piece of quilting cotton in half along the length. Open and fold in each short end 1/4″ and press. Now fold the long raw edges to the center and press.

6. Fold again with all raw edges facing the center and press again.
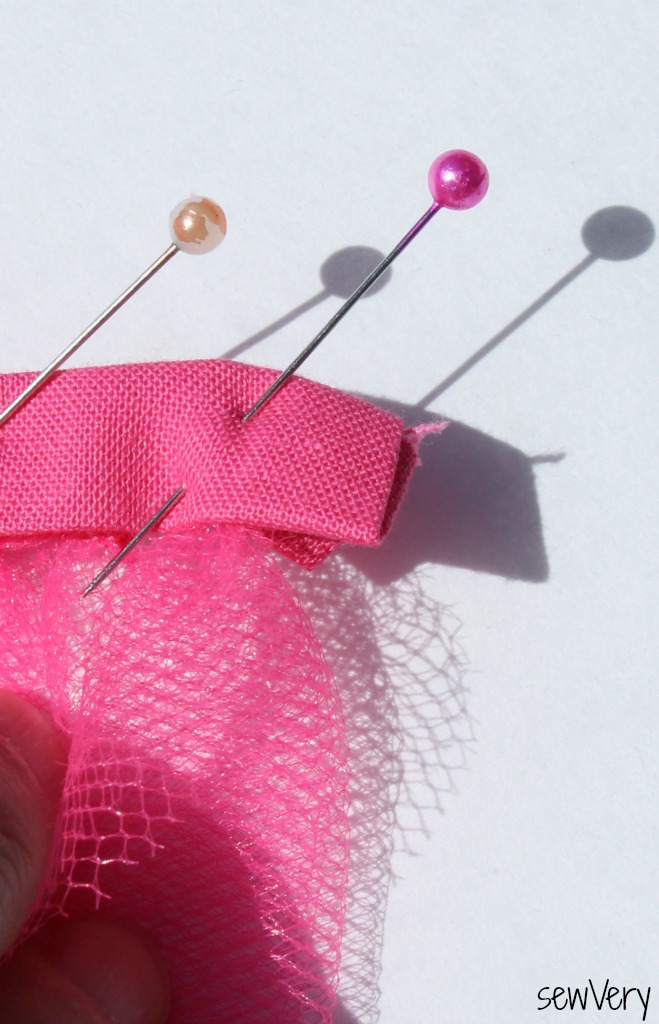
7. Slightly open the waistband and insert the gathered edge of the skirt inside beginning at the left. Refold the waistband over the skirt edge and pin together.
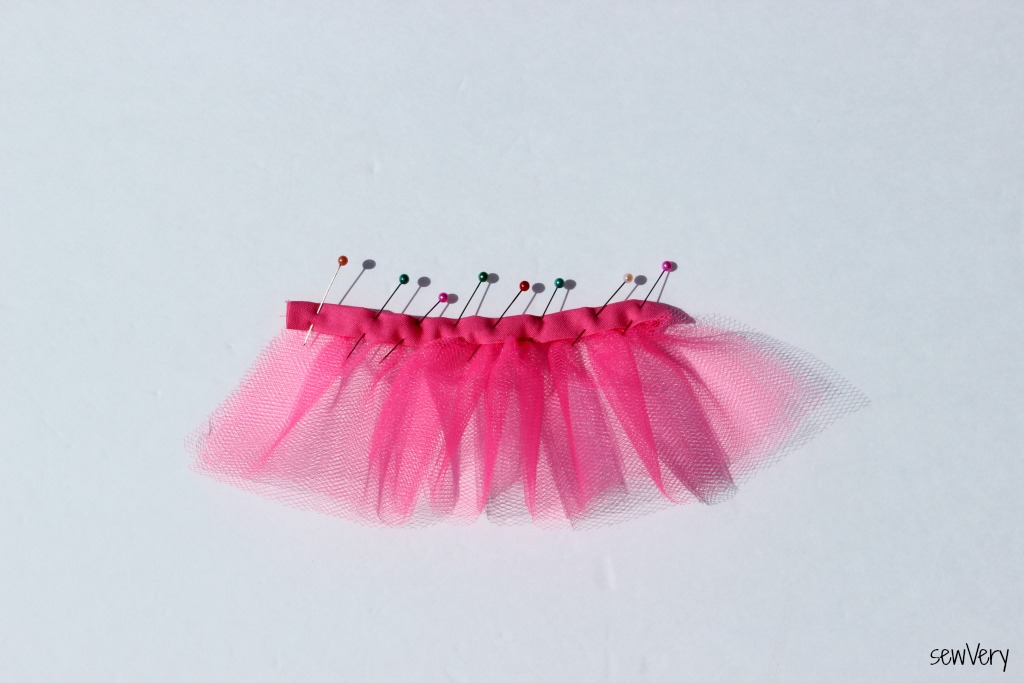
8. The last 1/4″ of the waistband should be free of any gathered skirt. When the snaps are added, this part will overlap the other end of the waistband without the skirt overlapping.
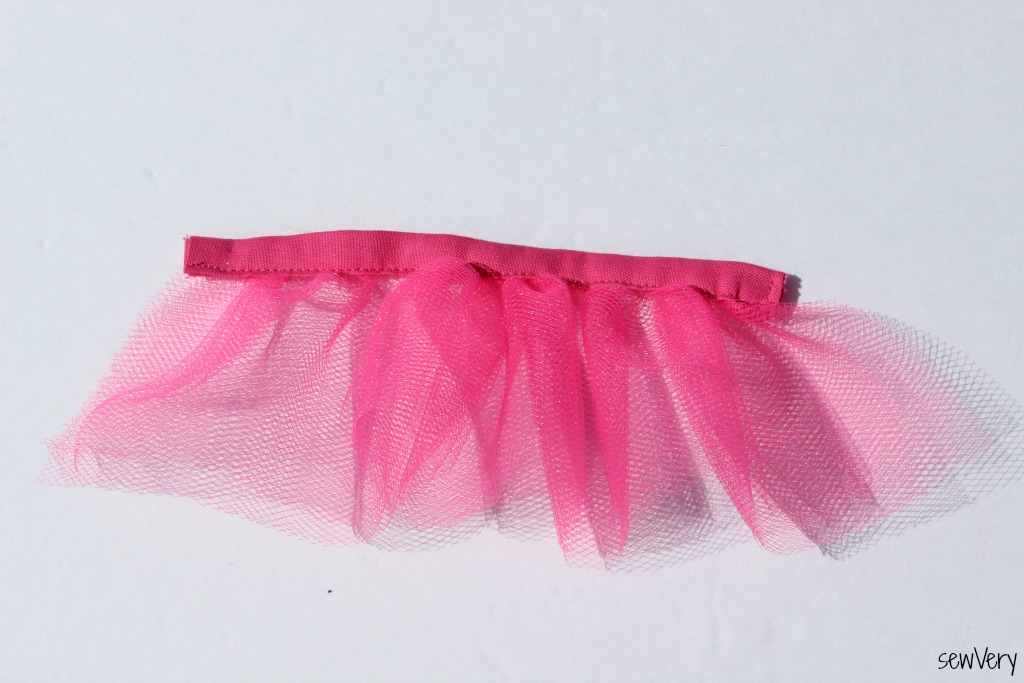
9. Sew the waistband to the skirt sewing through all layers.
10. With the skirt laying right side up, hand sew the female end of the snap onto the left end of the waistband.
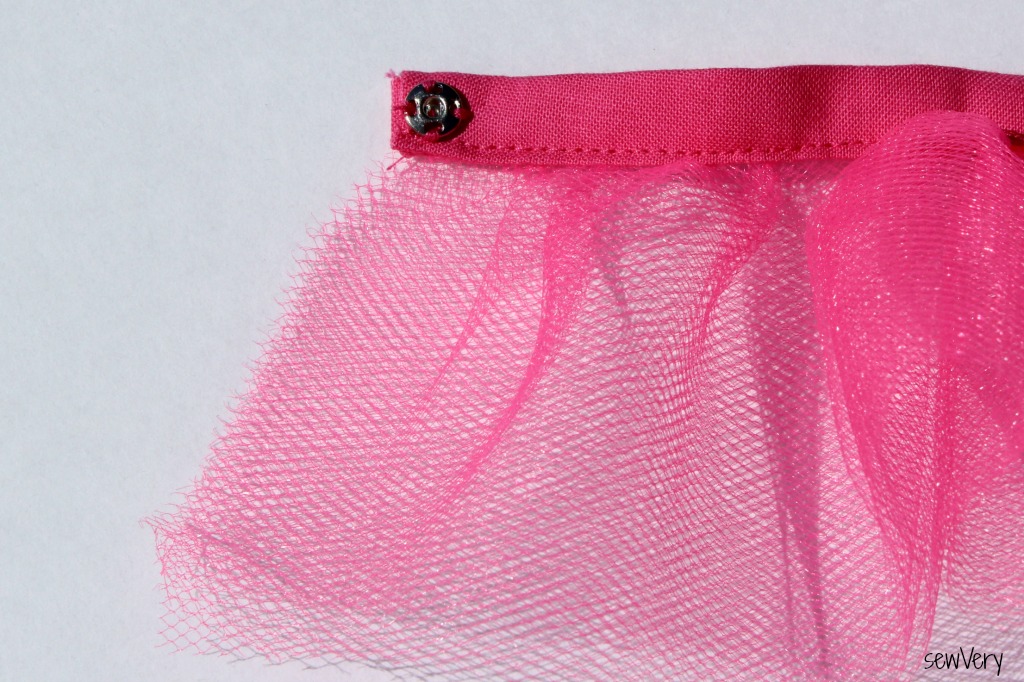
11. Flip the skirt over so the wrong side is now facing up and the waistband is at the top. Hand sew the male end of the snap onto the left end of the waistband.
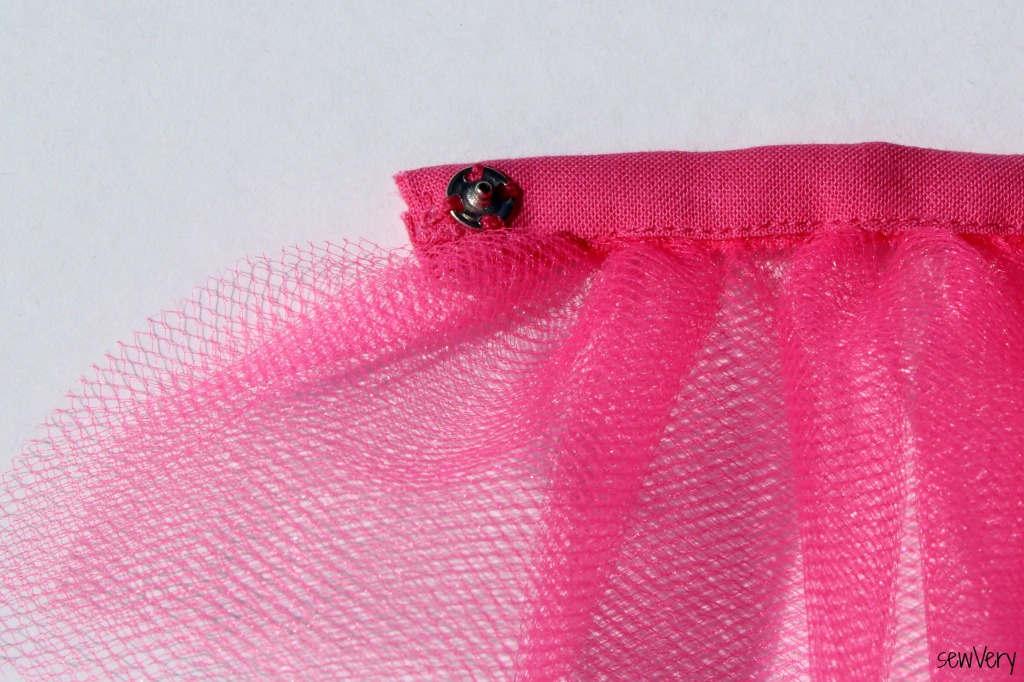
12. Apply Fray Check to the knots of the thread on the snaps to prevent them from coming undone. Overlap the waistband ends and snap the closure shut.

13. Try the tutu on your doll and enjoy!