D.I.Y. name clippies
August 16, 2011

(Today I have a treat for you! One of my favorite style blogger’s Linda from Little Tin Solider has a super easy + cute DIY project. She’s the best! xo, Kelle)
My name is Linda and I am the author of the personal style blog, Little Tin Soldier. I’m a big fan of Kelle’s artwork, and I am honored to share a back-to-school DIY with her readers.
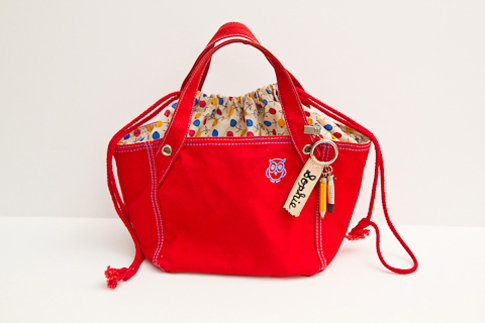
As a schoolteacher, I understand that families spend a fair amount of money on supplies, clothing, and backpacks. Inevitably some of those items end up in lost-and-found or even long-and-forgotten. Let’s help out our amazing kids with attachable (and detachable) name clips! Here are the instructions:
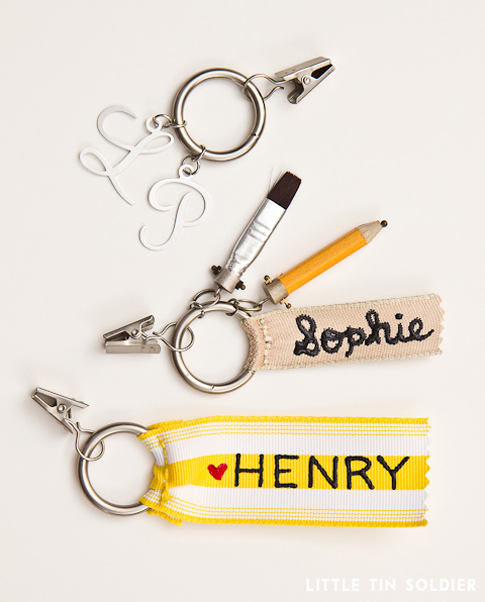
Name Clippies
Materials:
– 1″ curtain ring clip
– Assorted ribbon
– Needle and thread
– Assorted charms
– Jump rings
– Jewelry pliers
– Puffy paint
Directions
1. Choose a clip style.
2. For a monogrammed clip, attach silver letters or charms (available at most craft stores) to the curtain ring with jump rings. Decorate with your child’s initials (as shown) or spell out his/her entire name.
3. For a charmed clip, attach charms to your child’s liking. Fold and sew a 3/4″ ribbon along the edges of the curtain ring. Using puffy paint, embellish with his/her name.
4. For a ribbon clip, fold and sew a 1.5″ ribbon along the edges of the curtain ring. Using puffy paint, embellish with his/her name.
5. Allow the paint to dry for 24 hours.
6. Clip to your child’s lunch sack, sweater, jacket, or backpack.
(photos by Little Tin Soldier)


[…] these name clippies not the absolute cutest you’ve ever seen?! Ann Kelle has all the details behind these sweet and unique […]