July 16, 2012
(First up, in the “Christmas in July” series, we have my friend, Morgan making adorable advent garland. Be sure to read her brilliant idea on what to put in the bags.)

I love Christmas time, celebrating the birth of Christ and making new memories with my kids. An Advent calendar has been on my to-do list for awhile, so when I saw Kelle’s new ‘Jingle’ line of fabric, I thought this would be the perfect project for it. I played around with a couple ideas before settling on this Advent garland. I really am pleased with how it turned out, and it couldn’t be easier. Thank you, Kelle for inviting me back for another fun tutorial! — Morgan (Sweet Stitches).
posted by kelle at 2:07 pm
July 16, 2012

I’m interrupting summer fun, to bring you a series all about my favorite time of the year . . . Christmas! Yep, Christmas. So, put down your lemonade and get out of the pool, so we can talk a bit about Christmas. You’re probably wondering why I’m jumping seasons. I’m blaming it on my local quilt shop. It was during a visit last September, that one of the shop owners told me that her Christmas fabric is usually sold out by the end of the summer. I was quite surprised. Then, I glanced around and saw the empty shelves with little to no Christmas fabric in stock. With this news in hand, I thought it would be fun to have Christmas sewing tutorials for all of you early-Christmas sewers. So, there you go. Each day this week there will be a Christmas sewing tutorial. Did I mention they are all free? Yep, free. Okay, you can go back to sipping your lemonade. But, be here later today for our first sewing project.
(Special thanks to all the well-wishes for my vacation. I’m refreshed and tanned. — Kelle)
posted by kelle at 11:07 am
June 12, 2012

My Ipad needed something pretty to cover it. Anna of The Joy Cottage made these adorable sleeves. She’s pretty awesome. There are 3 different FREE patterns (for the Ipad, Kindle and Nook).
What I love about this sewing tutorial is that there are several options. First, you have the option to have a button or zipper closure. On “The Ruby” pattern, you get to choose where you’d like the diagonal part. And finally, they are instructions for the Ipad, Kindle and Nook. Lots and lots of options. See why I think Anna’s awesome?


Pick your favorite look and have fun sewing!
1. The “Claire” pattern
2. The “Penelope” pattern
3. The “Ruby” pattern
4. The “Ruby” pattern


(Please note: For added support, add as much cushioning as you want. This sleeve is to be used as a case. Additional protection may be needed to keep you ipad, kindle, or nook safe.)
(photos by Anna Pham and Kelle)
posted by kelle at 9:06 am
May 08, 2012

Our teacher for the day is Miss Darci Barnhart. She made an adorable skirt tutorial for me to share with you guys. She combined three of my Remix dots prints, which I bet Julie is going to love. It even has pockets! I personally think all skirts and dresses should have pockets. So, in my book, this skirt is perfection. Find the free tutorial here.
(photo by Darci Barnhart)
posted by kelle at 10:05 am
May 01, 2012

Hi everyone! It’s Morgan here from Sweet Stitches. I hope you enjoy this fun bolster pillow! It adds a little extra and whimsy to your pile of normal square pillows.

(more…)
posted by kelle at 12:05 pm
April 16, 2012

Hello again! It’s Morgan is here from Sweet Stitches. I am here again to share with you this super fun pillow. Trimmed with pom poms and made with bright, happy fabric, this pillow is sure to make you giddy just looking at it!

(more…)
posted by kelle at 10:04 am
March 20, 2012

I love thrifting. It’s one of my favorite things to do. I like finding old things and making them new again. Kinda like this chair. Head over there to the Petticoat Junktion blog to find out how Kathy transformed a $4.97 old chair into a playful one-of-a kind piece.
(photo by Petticoat Junktion)
posted by kelle at 10:03 am
March 08, 2012

Hi again! It’s Morgan here from Sweet Stitches with another sewing tutorial. As a follow-up to the headband tutorial I shared last week, I made a headband tutorial for little girls. My one year old daughter has hair half way down her back, so I always have to pull it away from her face. I came up with this simple headband to keep all the little whispies out of her eyes. Perfect for the summer!

With 2 kids, I’m all about fast and easy projects. This headband is so simple. All you need are 2 supplies. You won’t want to make just one! Go grab some scrap fabric and lets get started!
(more…)
posted by kelle at 9:03 am
February 28, 2012

(Morgan is here from Sweet Stitches to share with you guys a SUPER simple tutorial . . . even I could make this with my minimal sewing skills).
Hi! I am so excited to be doing a guest-post here on Kelle’s blog! Thank you for having me! Got 10 minutes, some scrap fabric and a rubber band? Then you have all you need to make a cute and useful headband perfect for those bad hair days, working out, or hanging out!

I came up with this headband when I was pregnant with my daughter, for those days when I didn’t feel like fixing my hair. I probably made at least 10 just for me! It really is a very easy project, I hope you all get a lot of use out of it.
(more…)
posted by kelle at 10:02 am
February 27, 2012
{Today we have an interview with Pat Wodskow of Cuddle Soft Quilt Kits. She’s going to talk to us a bit about cuddle fabric, and even share a recipe with us}.

Tell us a little about yourself? I love to sew. I have made everything from my children’s clothing to quilts. I currently work for Shannon Fabric as a designer and consultant. It’s a great job; I get to make sample quilts at home and go to Quilt Markets to teach and work in their booth. I also have my own web store where I sell quilt kits made from Shannon Fabric’s Cuddle fabrics. In my spare time I enjoy spending time with my family. I have seven children and 28 grandchildren.

Tips on sewing with cuddle? Cuddle Soft fabrics (sometimes called Minkee) are slick and stretchy. This makes them a little harder to work with unless you understand a few rules. Here are a few tricks that I have found to be very helpful:
1. Using the spray adhesive, fuse the back and the batting together.
2. After you have secured the backing and batting together, trim so the edges are clean.
3. A size 90 stretch needle works the best.
4. A walking foot really helps.
5. The key in making this blanket look so great is the spray adhesive.
6. Use a 3/8”-1/2” seam allowance.
7. Freezer paper is a great protector when using the spray glue.
8. Cuddle soft fabrics are really washable. Don’t be afraid to wash and love your quilt.
9. When using a batting the “sew and flip” method works best using an 80/20 cotton batting.
10. To make a soft snuggle blanket use the same “sew and flip” method, but leave out the batting.
For more detailed tips head here.

Where can we find more information? My web site is www.cuddlesoftkits.com. In my shop I sell all kinds of kits. While I focus on babies I also offer some beautiful quilts for everyone in the family. These quilts are so washable and easy to make that it is fun to make one for everyone in the family. On the web site I offer some great teaching videos in the Learning Center that will help even the beginner make a beautiful quilt. I offer everything you need to make your quilt; the kit, the backing fabrics, the batting, the spray adhesives and even the needles.

Totally not quilt related, but what’s your favorite dessert? Raising seven children requires a lot of cooking! I learned to love cooking as much as I do sewing. We made all kinds of wonderful meals. One of our favorite desserts is Soft Gingerbread. It came from a blender recipe book that I bought when I had my first baby. We love to serve it with warm applesauce and whipped cream. It is also really good with this caramel sauce. Find the recipe here.
(photos by Cuddle Soft Quilt Kits)
posted by kelle at 9:02 am
February 22, 2012
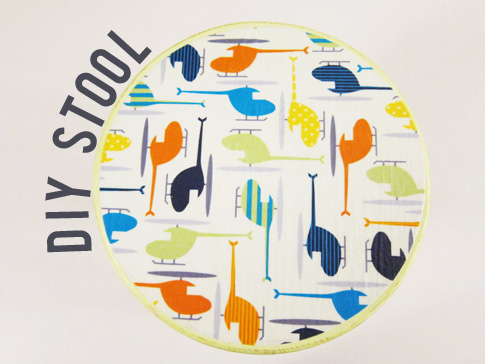
Today I have a special treat for you today. I love painted furniture. But, after unsuccessfully painting a lamp, I retired my furniture painting days and found Kathy. Kathy’s from my hometown Clarksville, TN. After seeing a decoupage project on her blog, I asked if she could do a tutorial for you guys. She came up with this adorable little stool using my Ready, Set, Go fabric. It’s the cutest and I love the look of distressed furniture.
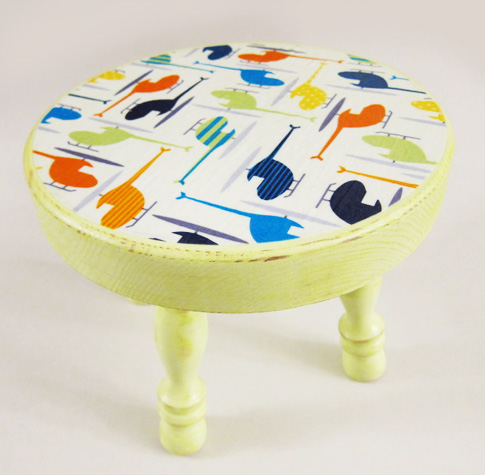
I’m passing the blog post “baton” to Kathy. Hear all about how she made this sweet decoupage stool . . . she even took pictures to accompany her instructions. (more…)
posted by kelle at 10:02 am
December 23, 2011

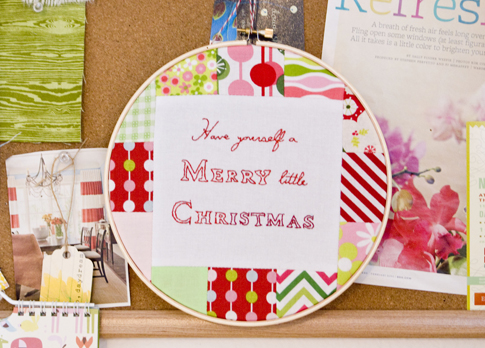
Wishing all of you a very Merry Christmas and a Happy New Year! I’ll see you guys in 2012.
(Free embroidery hoop instructions here by Striped Feather Company)
posted by kelle at 12:12 pm
November 28, 2011

Handmade Holidays is coming your way! Oodles and oodles of great gift ideas for the holidays, featuring five super-talented and awesome crafters. All of the sewing projects are super easy and will be made with Ann Kelle fabric. So, be on the lookout! We’ll kick things off the first part of December.
(photo by Ann Kelle)
posted by kelle at 10:11 am
September 12, 2011


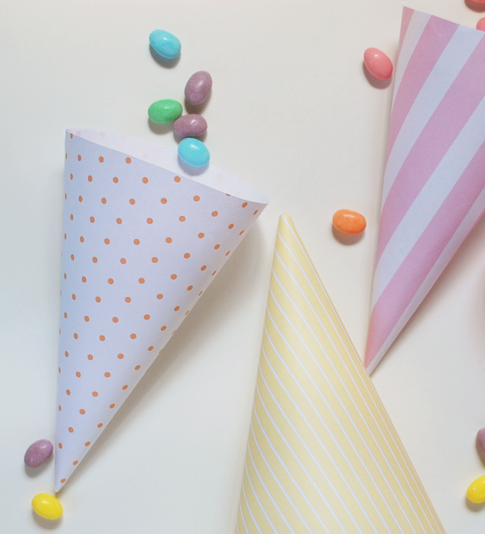
Printable cones for your birthday parties, soirees and other fun times. Get them here . . . jelly beans not included.
(photos by Ann Kelle)
posted by kelle at 10:09 am
September 06, 2011

Hello again, friends of Kelle! My name is Linda and I am the author of the personal style blog, Little Tin Soldier. I’m returning with another fun back-to-school DIY especially designed for teachers and moms.
Cork bulletin boards are helpful at home and school for organizing notes. Dress them up with fabric and ribbon to create a cheerful (and easily readable) work of art for your family or students.
Daisy Mae Bulletin Board
Materials:
– Cork bulletin board (with or without frame)
– Fabric (featured fabric by Ann Kelle)
– Assorted ribbon
– Manila shipping tags
– Markers
– Stapler
– Pushpins or thumbtacks
Directions
1. Lay the bulletin board on top of your fabric. The right side of both board and fabric should face down.
2. Trim the fabric and leave at least 2″ fabric on each side.
3. Beginning with one side, fold the fabric over the back of the board and secure with a stapler or pins.
4. Repeat for all sides, pulling fabric taught as needed.
5. Turn the board over.
6. Use wide strips of ribbon to create columns and secure with a stapler or pins.
7. Add manila shipping tags to designate days of the week (or use names for a family or group). Secure with pins.
8. Organize activities, business cards, or notes by pinning them to the appropriate column of ribbon.
(photo by Little Tin Soldier)
posted by kelle at 11:09 am
August 16, 2011


(Today I have a treat for you! One of my favorite style blogger’s Linda from Little Tin Solider has a super easy + cute DIY project. She’s the best! xo, Kelle)
My name is Linda and I am the author of the personal style blog, Little Tin Soldier. I’m a big fan of Kelle’s artwork, and I am honored to share a back-to-school DIY with her readers.
As a schoolteacher, I understand that families spend a fair amount of money on supplies, clothing, and backpacks. Inevitably some of those items end up in lost-and-found or even long-and-forgotten. Let’s help out our amazing kids with attachable (and detachable) name clips! Here are the instructions:
Name Clippies
Materials:
– 1″ curtain ring clip
– Assorted ribbon
– Needle and thread
– Assorted charms
– Jump rings
– Jewelry pliers
– Puffy paint
Directions
1. Choose a clip style.
2. For a monogrammed clip, attach silver letters or charms (available at most craft stores) to the curtain ring with jump rings. Decorate with your child’s initials (as shown) or spell out his/her entire name.
3. For a charmed clip, attach charms to your child’s liking. Fold and sew a 3/4″ ribbon along the edges of the curtain ring. Using puffy paint, embellish with his/her name.
4. For a ribbon clip, fold and sew a 1.5″ ribbon along the edges of the curtain ring. Using puffy paint, embellish with his/her name.
5. Allow the paint to dry for 24 hours.
6. Clip to your child’s lunch sack, sweater, jacket, or backpack.
(photos by Little Tin Soldier)
posted by kelle at 8:08 am
July 11, 2011

I have something for you today. Not one, but 3 pillows patterns. I thought you might need something sweet to make this summer. Download your free patterns here, here, and here .

* A special thanks to Anna Joy Pham for taking my ideas and turning them into patterns.
(photos by Ann Kelle)
posted by kelle at 10:07 am
May 27, 2011

(Photo by Rubyellen of Cakies. Read more about her craft project here.)
posted by kelle at 9:05 am
March 31, 2011

Sit on it, push it, toss it . . . it will give your little one hours of fun. Get your free download here.
(photo by AngelaCrutcher)
* Cube insert courtesy of Downlite.
posted by kelle at 8:03 am
February 11, 2011

Here’s another no-sew project. Find the instructions below.


Heart Box Supplies:
– fabric
– Heat’n Bond iron on adhesive
– iron
– scissors
Heart Box Instructions:
1. Unfold box
2. Measure length and width of box
3. Cut fabric and Heat’n Bond according to the measurements of the box
4. iron fabric on to Heat’n Bond (iron onto the sticky side of the Heat’n Bond)
5. use unfolded-box as a template to cut out box shape from fabric
6. iron fabric to the unfolded-box
7. repeat steps 4-6 if you are covering the inside
(photos by Ann Kelle)
posted by kelle at 8:02 am
February 08, 2011

My sewing teacher had a hunch that I need a break from learning to sew. So, she introduced me to my new best friend, Heat’n Bond. It makes playing with my fabric super fun and easy. I made these cute pencil toppers for Valentine’s Day. Here are the instructions.
Heart Pencil Toppers Supplies:
– fabric (3 inches x 7 inches)
– Heat’n Bond iron on adhesive (3 inches x 7 inches)
– iron
– scissors
– cardstock paper
Heart Pencil Toppers Instructions:
1. Print out heart templates (small and large) on card stock paper. Cut out shapes.
2. Place fabric on top of the sticky side of Heat’n Bond.
3. Iron fabric piece to Heat’n Bond
4. Using heart templates, cut out small and large heart from fabric piece
5. Peel off the back of Heat’n Bond from small heart
6. Iron fabric/Heat’n Bond to the small paper heart (this will make it more sturdy)
7. Peel off back of Heat’n Bond from large heart
8. Place pencil in the middle of heart in between the fabric pieces
9. Iron around the heart and leave a space for the pencil to be inserted
10. Trim off any excess pieces

(photos by Ann Kelle)
posted by kelle at 7:02 am
