February 05, 2018
 I made a two FREE printable valentine’s cards, which you can find below. If you download them, I’d LOVE to see them in use. You can use the hashtag #annkelle on social media.
Find the free Valentine’s Day Card below:
Bright Days Area Ahead
Have An Amazing Day


(photos by Kelle)
SaveSave
SaveSave
SaveSave
SaveSave
posted by kelle at 7:02 am
January 10, 2017

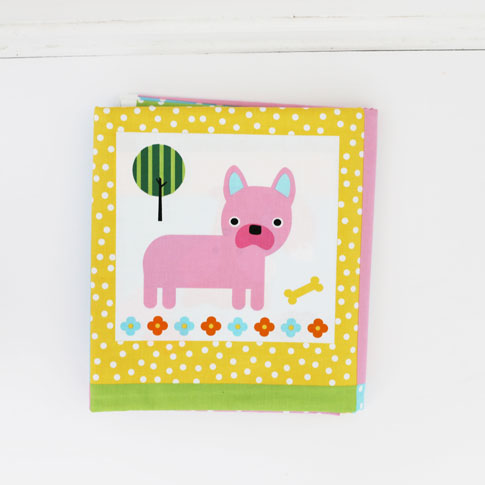
There’s so many things you can do with fabric panels. You could make quilts, pillows, wall art, tote bags, etc. Today I’m sharing with you how to use the panels to make a toddler sweatshirt. To provide a reference on the sizing, the sweatshirts we used are a 2T. For bigger shirt sizes, you could add more than one animal or the entire animal shape. Jump below for the super easy tutorial.
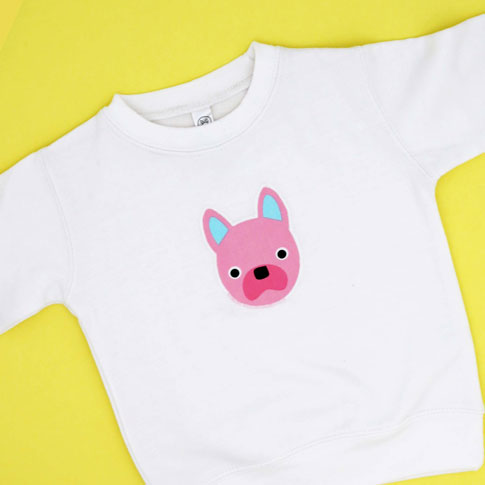

The sweatshirt applique is so simple. Here’s what we did:
1. Using a piece of Heat-n-Bond Lite cut slightly larger than the animal head, fuse it to the wrong side of the fabric panel centered over the animal head.
2. Cut out the animal head leaving a 1/8″ seam allowance all around it.
3. Remove the paper backing from the Heat-n-Bond Lite and fuse it to the sweatshirt.
4. Using a zig zag stitch with a width of 2.5 and a length of almost 0, stitch over the seam allowance covering the raw edges of the fabric on the animal face.
(photos by Kelle)
posted by kelle at 8:01 am
October 11, 2016
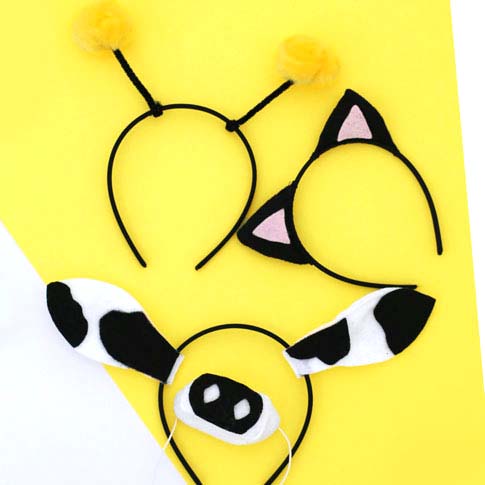
I think my love of costumes originated from my Mom. When I was a child, my Mom would make the BEST costumes for us kids. Using creativity and things around the house, she would always come up with the most unique costumes. And the costumes weren’t just for the kids, my Mom and Aunts (Mom’s sisters) would also wear costumes they made. We decided to make simple, diy costumes based on the kids in my Pumpkin Fun fabrics. These are super easy with loads of cuteness. Find the directions on how we made these below.


(more…)
posted by kelle at 8:10 am
May 31, 2016

I scream, you scream, we all scream for THIS ice cream quilt! This is one fun quilt! Once I saw Sylvia Sutters of A Stranger View’s Mod Ice Cream Quilt pattern, I was giddy. It’s the perfect summer quilt . . . reminiscent of childhood trips to the ice cream shop, tasting all the flavors before settling on a new favorite. Using my Remix prints and yummy Kona solids, this quilt is all about playfulness and color. To make one, head here for the pattern. There’s also a pattern for the pillow which you can find here.


We went with simple quilting, which I love.


Scrappy colorful binding is always a win!

(quilt pattern and pillow pattern by A Stranger View /// photos by Kathyrn McCrary )
posted by kelle at 8:05 am
November 03, 2015

Free apron tutorial by Veronica at Sew Very.
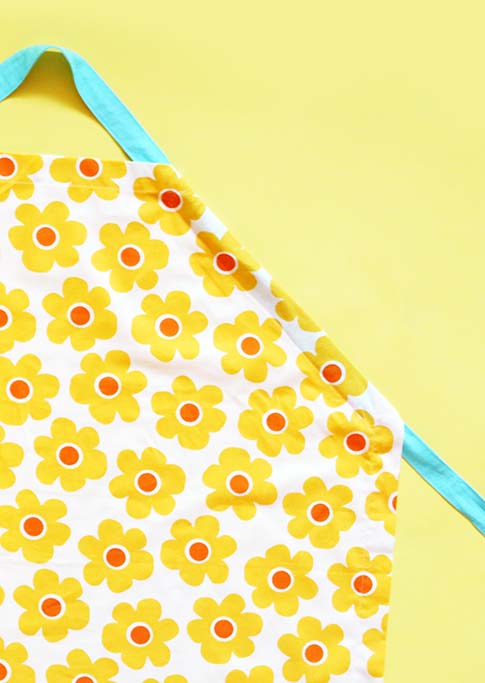
One of the things that’s really neat about this apron, are the straps. You can adjust the length of the apron by pulling on the straps. You can also make the straps long enough to tie in the front as we did. Find the free tutorial below. Happy Sewing!
(more…)
posted by kelle at 7:11 am
July 29, 2015

With “back to school” time upon us, I thought I’d share an easy project. Find the tutorial here.


posted by kelle at 9:07 am
February 09, 2015

Valentines Day is this Saturday. When most people think of this day, they think of romantic love. But, I see Valentines day as a day to spread love. So, whether you have a significant other or not, here are some ways you can spread the love on Valentines day.


1. Make goodie bags full to treats. You can make several goodie bags filled with candy, fruit or fun trinkets. (You could also sew some little bags. See these I made a couple years ago.) Give the bags to random people, colleagues or even people that work at places you visit often (i.e grocery store, coffee shop, mall etc). We did this two years ago and it was a lot of fun! People were totally surprised and seemed to really enjoy the bags.

2. Bake cookies or sweets. Pull out your favorite cookie recipe. After you bake your tasty sweets and decorate them (we baked heart shaped cookies), give them to your neighbor, friends, co-workers, etc..


If you’re not a great baker, you can also purchase pre-made sweets to pass out.

3. Give a bag full of hearts. As an alternative to a bag full of sugary-sweets, you can always fill a bag with heart themed or valentines day items. If you’re feeling crafty, you could make a heart brooch, heart clutch, or even heart pencil toppers .
4. Provide a service. Whether it’s your neighbor, friend, grandparent, new mom, etc., everyone needs a helping hand. Whether it’s raking their leaves, putting out their garbage bin, or bringing them a meal, gifts of service are always a win, win!
5. Pay for someone’s coffee. It is always fun when you’re in the Starbuck’s line, and you go to pay for your coffee and are told that its already been paid.
6. Send Something. You can send flowers, pizza or send both. It will totally be unexpected and a treat for sure!
7. Make Something. Making something can be really fun, but you probably need to start now. Here’s a couple of sewing project ideas: heart pillows, monogram pillow, head band.
8. Be Kind. If you really want to celebrate this day to the fullest, then just be kind to everyone you meet. Pay someone an honest compliment, smile at a stranger, let a person go in front of you at the register or just encourage someone. Kindness is golden!
(top photo found here ; all other photos by kelle)
posted by kelle at 7:02 am
December 08, 2014

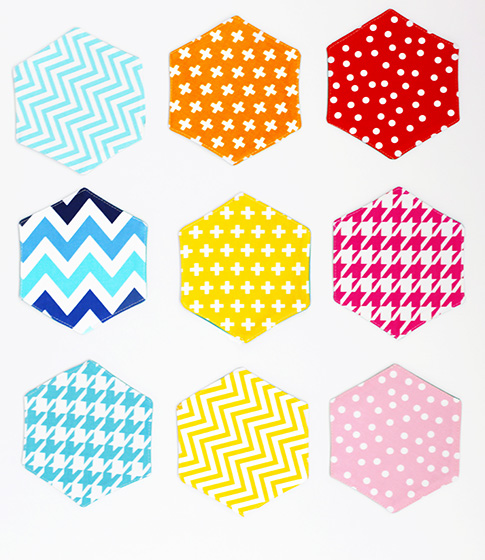
Here’s a fun little game to help you build your concentration skills. When we played this as kids they called it “The Memory Game” or “Matching Game.” We often played it with cards. This is our take on that same fun little game but we’re using fabric. We took some of our favorite remix pieces and cut them into little hexagon shapes. Download the tutorial here. (By the way, after playing the game, we realized that there is a little room to cheat, because you can see some of the colors on the side. So, you may want to make several of the same color pieces.) Anyway, it still made for a fun time!

(photos by Kelle)
posted by kelle at 7:12 am
December 04, 2014

The holidays are fast upon us, which means time with family and friends. What better way to pass time, catch up on how everyone has been doing, and make new memories than over a game of checkers. So, here is a fun tutorial that promises to help create opportunities to bond with family and friends. Whether you’re bonding by making this super cute checkerboard, or you’re bonding by playing on this super cute checker board, it promises to be loads of fun!


Download this tutorial here.
(photos by Kelle)
posted by kelle at 11:12 am
November 13, 2014
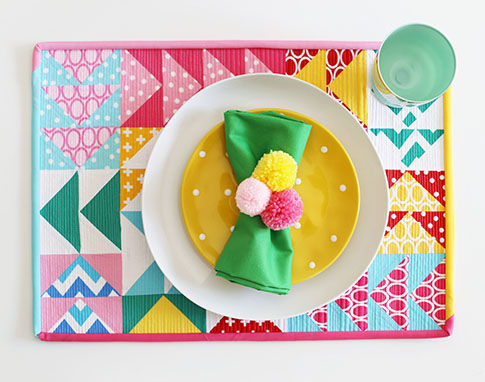
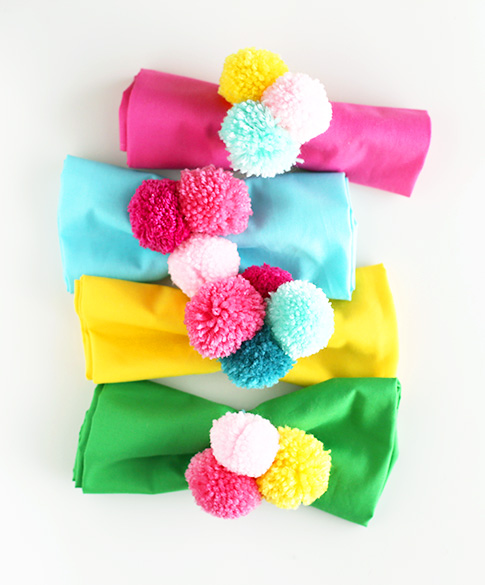 I found this easy pom-pom napkin ring tutorial by Art Bar a while ago. The tutorial was super easy and fun! Find the tutorial here.
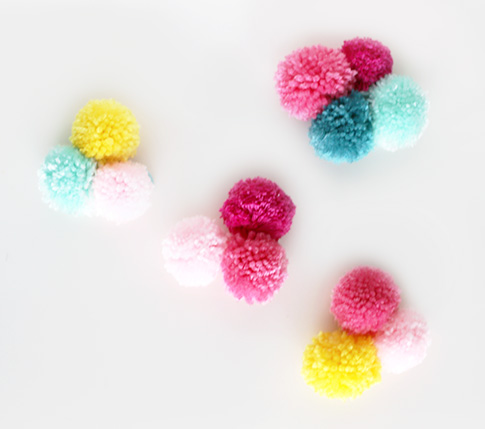
(photos by Kelle)
posted by kelle at 7:11 am
July 22, 2014
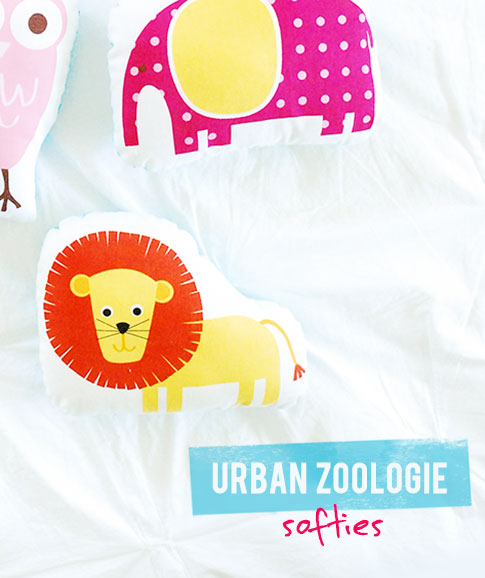
One of the things I was most excited about with my new Urban Zoologie panels, was that you’d be able to make softies. I had a couple made . . . okay, more than a couple, to give you an idea. This is a pretty easy tutorial. But, to see if this would be a kid-friendly sewing project, I gave a panel to eleven year old, Abby (daughter of The Southern Institute). She was able to sew a few softies (not pictured) without even using the tutorial! Abby’s main tip: Make sure you give yourself plenty of room around the animal, especially around skinny areas, such as the legs or tails. Otherwise, it can be hard to stuff. Great advice! Find the free tutorial here.

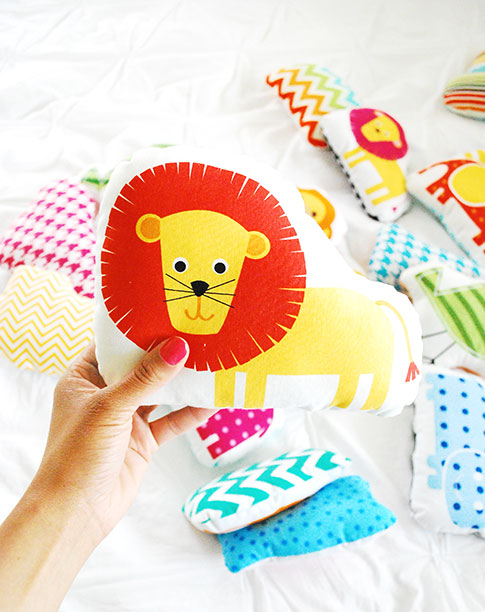

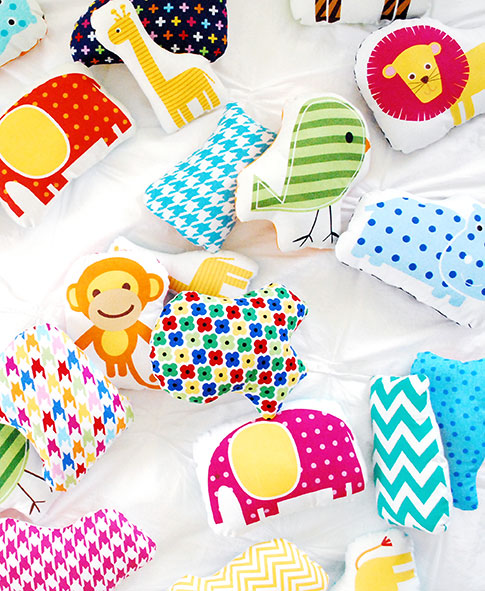
(photos by Kelle)
posted by kelle at 8:07 am
April 02, 2014

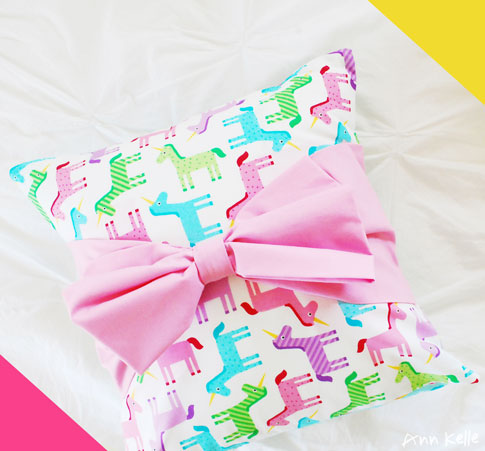
I’m pretty excited about this tutorial. My sewer friend, Laurie, is back again with a free tutorial that includes a big pretty bow! She came up with this sweet bow pillow and was kind enough to turn it into a tutorial, which you can find here.
(more…)
posted by kelle at 6:04 am
July 03, 2013
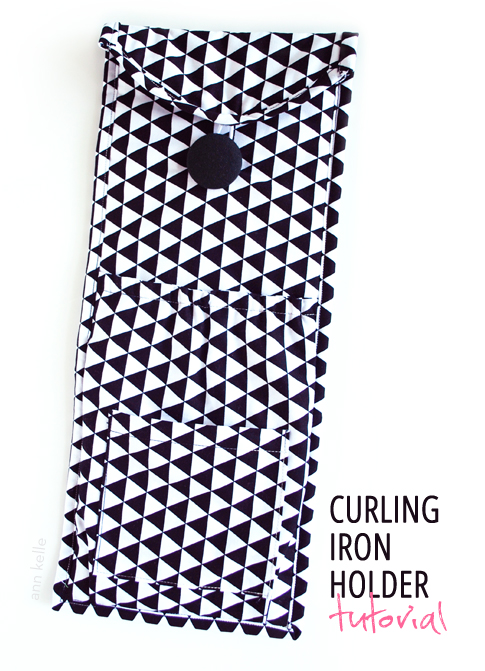
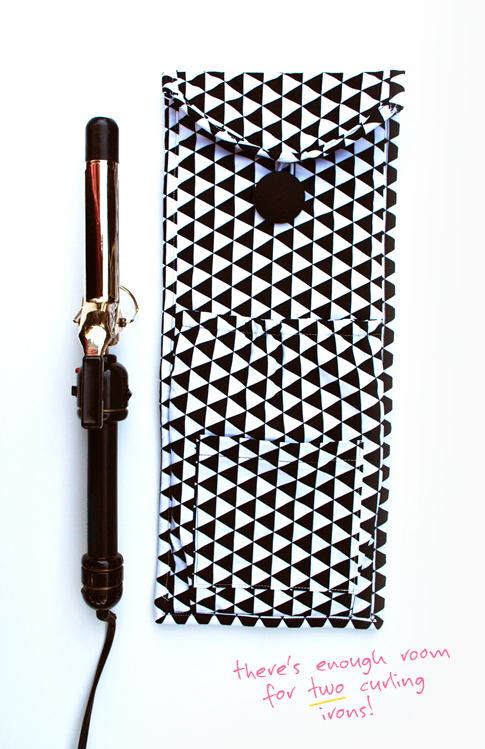
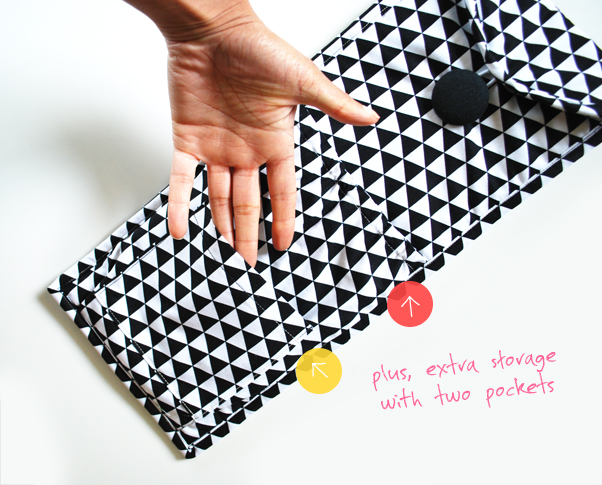
Free curling iron holder tutorial by Brooke , which you can find here.
(photos by Kelle)
posted by kelle at 4:07 pm
June 10, 2013

Looking for a simple baby shower gift to sew up? How about some baby bibs. For these bibs,
Brooke used my Slicker fabric (laminated cotton) for the front and chenille for the back. It’s so soft and comfy with the chenille on the back. The Slicker fabric makes for easy clean-up. To make your own bib, below are some tutorials for you to check out. We used
Heather’s Bailey’s tutorial for the smaller bibs and drew out a larger bib template for the toddler size. See below for Brooke’s additional tips. It was super easy and took less than 45 minutes.

Brooke’s tips: I cut
the pattern out of just the laminate. Then lay the laminate bib piece, right sides together over a larger piece of chenille. Then using my walking foot, sew 1/4 inch seam, leaving an opening. Then I cut both the chenille and laminate to reduce bulk and make turning right side out easier. When top-stitching the bibs, I used a Teflon foot. After the bib is finished, I tossed them in a warm water wash and then into the dryer.
Free Bib Tutorials:


featured prints: urban zoologie “owls” slicker / urban zoologie “cows” slicker / urban zoologie “birdies” slicker / urban zoologie “pigs” slicker / girl friends “mermaid” slicker
(photos by Kelle)
posted by kelle at 3:06 pm
June 03, 2013

We all need a little sweet hug every now and then. I worked with Amanda to create this super easy Cloud Pillow tutorial, which you can find here. Hug them, hang them on the wall, or give them as a gift. They’d make a sweet baby shower gift. Not all clouds are dark and dreary.


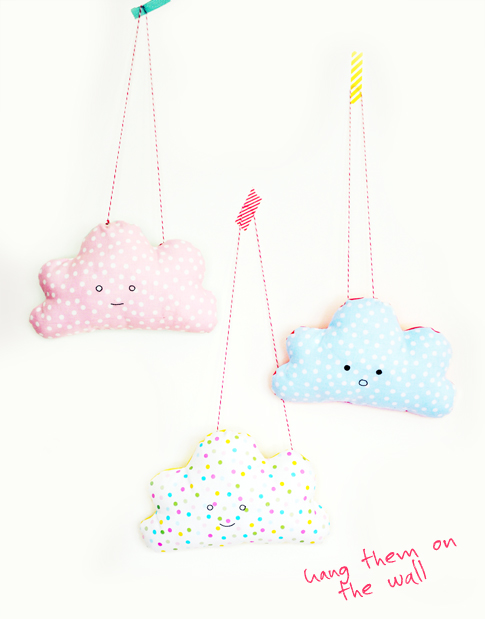

Fabrics used:
– Remix “sky” dots
– Remix “sping” dots
– Remix “peony” dots
– Kona cotton solids
(first and fourth photo by Angela Crutcher / all other photos by Kelle)
posted by kelle at 3:06 pm
May 15, 2013

Free wall kite tutorial written by Amanda Hall , which you can find here. A complete list of the fabrics used in this kite are listed below.


Fabrics used in wall kite:
– robert kaufman kona solids
– remix “spring” flowers
– remix “spring” dots
– urban zoologie “spring” birdies
– remix “spring” stripes
– urban zoologie “spring” butterflies
(photos by Angela Crutcher Photography)
posted by kelle at 12:05 pm
November 28, 2012

Anna from The Joy Cottage is here sharing another awesome sewing tutorial. This little super hero cape is sure to put a smile on your little one’s face. Get your free tutorial here.


(photos by The Joy Cottage)
posted by kelle at 9:11 am
October 23, 2012

My sewing buddy Kelly made this adorable shower curtain for her boy’s bathroom using some of my Urban Zoologie Slicker fabric, along with coordinating cottons fabrics (Remix and Kona solids). Fun + bright. Find the free tutorial here.

(photos by Kelly)
posted by kelle at 9:10 am
October 16, 2012

It’s no secret that I’m wild about stripes. Not only will you find them in many of my designs on both stationery and fabric, but they’re also on my wall! My washi tape wall is one of the many house projects I’ve worked on since moving.

There was no method or plan to washi-ing my wall. I just got a chair, grabbed some tape and got to work. I didn’t measure anything or sketch out the color scheme for the stripes. Whatever color I reached for, was what I put up next. It felt a lot like designing. Some of the stripes came out uneven, which I’m fine with. Washi tape is so forgiving. I was able to pull it off and on as many times as needed. The only tape I had problems with was the yellow striped tape, which I ended up using rubber cement to secure it to the wall.

It’s been a little over a month, the tape hasn’t fallen off and I still haven’t grown tired on the stripes. They’re the perfect punch of color and happiness!
(photos by Kelle)
posted by kelle at 9:10 am
July 25, 2012

Boy, do I have a sweet treat for you today! Brooke of Silly Mama Quilts made this beyond adorable table runner. And I liked it so much that I decided to host a little tea party for some friends.

Four of my stuffed friends gathered for some tea. And when they arrived, they all agreed that the table runner was over the top cute.

As a child, I never liked using play food for tea parties. So, I decided to get real food for our special occasion.

I don’t think Mr. Owl liked the real food though. He didn’t touch anything.


Foxie tried to convince Mr. Owl to eat, but he wouldn’t eat a thing.

I turned my back for half a second and before I knew it, food started to fly. It was a food fight!

After cleaning up, they were all put in time-out . . . I now understand why play food is used at tea parties.

And although they were silent when questioned, I’m quite sure Mr. Giraffe started the food fight. It’s written all over his face.

To make your very own table runner, head here for a free tutorial. As I mentioned, this table runner is the cutest! So much so that I’m refusing to send it back to Brooke. I think my stuffed friends’ behavior wore off on me a bit. And to see these stuffed friends and others, head over here.
(photos by Kelle; special thanks to Jill and Brooke for their awesomeness)
posted by kelle at 10:07 am
July 20, 2012
I hope you all have enjoyed the “Christmas in July” series featuring my Jingle and holiday Remix fabric. A huge thanks to all the awesome sewers and quilters who participated. On Monday, I have a special treat for you guys. Until then, have a great weekend! — Kelle

The final tutorial in the “Christmas in July” series is a stocking tutorial. This tutorial is really very easy. We’re practically “winging it”! — Anna Joy from The Joy Cottage
(more…)
posted by kelle at 10:07 am
July 19, 2012

As we continue our Christmas in July series, this sewing project speaks to my heart. I love lounge pants. In fact, I have a collection of Christmas themed pj bottoms that I only wear Christmas Eve. (I like to think this will score me extra points with Santa). I can’t wait to add some “Jingle” lounge bottoms to my collection. So, hop over to Hopeful Threads to learn how to make these lounge pants. (She’s even got a pair with ruffles!) Plus, her sweet children are modeling them.
(photo by Lovely Day Photography)
posted by kelle at 10:07 am
July 18, 2012

This is such a clever, modern quilt for Christmas. Christmas trees for a Christmas quilt! Laurie Matthews is the creative brains behind this quilt and has written out a free pattern just for you. But, her awesomeness doesn’t end there. With the left over scraps, she also has created a fun Christmas tree skirt and stocking for her new arrival.
(photo by Laurie Matthews)
posted by kelle at 10:07 am
July 17, 2012

Today we have the super-talented Vanessa Christenson of V and Co. Vanessa used my holiday Remix fabric to make this adorable apron. How fun would it be to bake Christmas cookies in this little apron? To learn how to make one head over here, and be sure to check out all of Vanessa’s awesome work.
(photos by V and Co)
posted by kelle at 4:07 pm